Why You’ll Love Crispy Rice Recipe
You’ll love this recipe because:
-
You get a satisfying crunch on the outside and a soft, fluffy texture inside.
-
It’s easy to make with just a few straightforward ingredients and accessible methods.
-
It’s highly versatile — you can dress it up for appetizers, sides or even snacks.
-
It’s naturally gluten‑free and vegan (when made as shown).
-
It’s meal‑prep friendly: cook ahead, chill, and fry when ready.
Ingredients
(Tip: You’ll find the full list of ingredients and measurements in the recipe card below.)
For the Rice Base:
2 cups sushi rice (or any short‑grain rice)
2 ½ cups water
2 tbsp rice vinegar
1 tbsp sugar
½ tsp salt
For Frying:
2 tbsp neutral oil (avocado, vegetable, or sesame oil)
Directions
-
Cook the Rice: Rinse the rice under cold water until the water runs clear (this removes excess starch and helps prevent stickiness). Then combine rinsed rice with water in a pot. Bring to a boil, reduce heat to low, cover and simmer about 15 minutes until water is absorbed. Remove from heat and let it sit, covered, for another 10 minutes.
-
Season the Rice: In a small bowl, mix the rice vinegar, sugar, and salt until dissolved. Gently fold this mixture into the cooked rice. This adds flavor and helps the rice grains stick together for the pressing stage.
-
Chill the Rice: Transfer the seasoned rice to a shallow pan or baking dish. Press it down firmly to create an even layer approximately 1‑inch thick. Cover with plastic wrap and refrigerate for at least 4 hours (or overnight) — chilling helps firm up the rice and makes it easier to cut and fry.
-
Cut the Rice: Once chilled, remove the rice from the pan and cut into squares or rectangles. This ensures even frying and gives you those signature crisp‑rice bites.
-
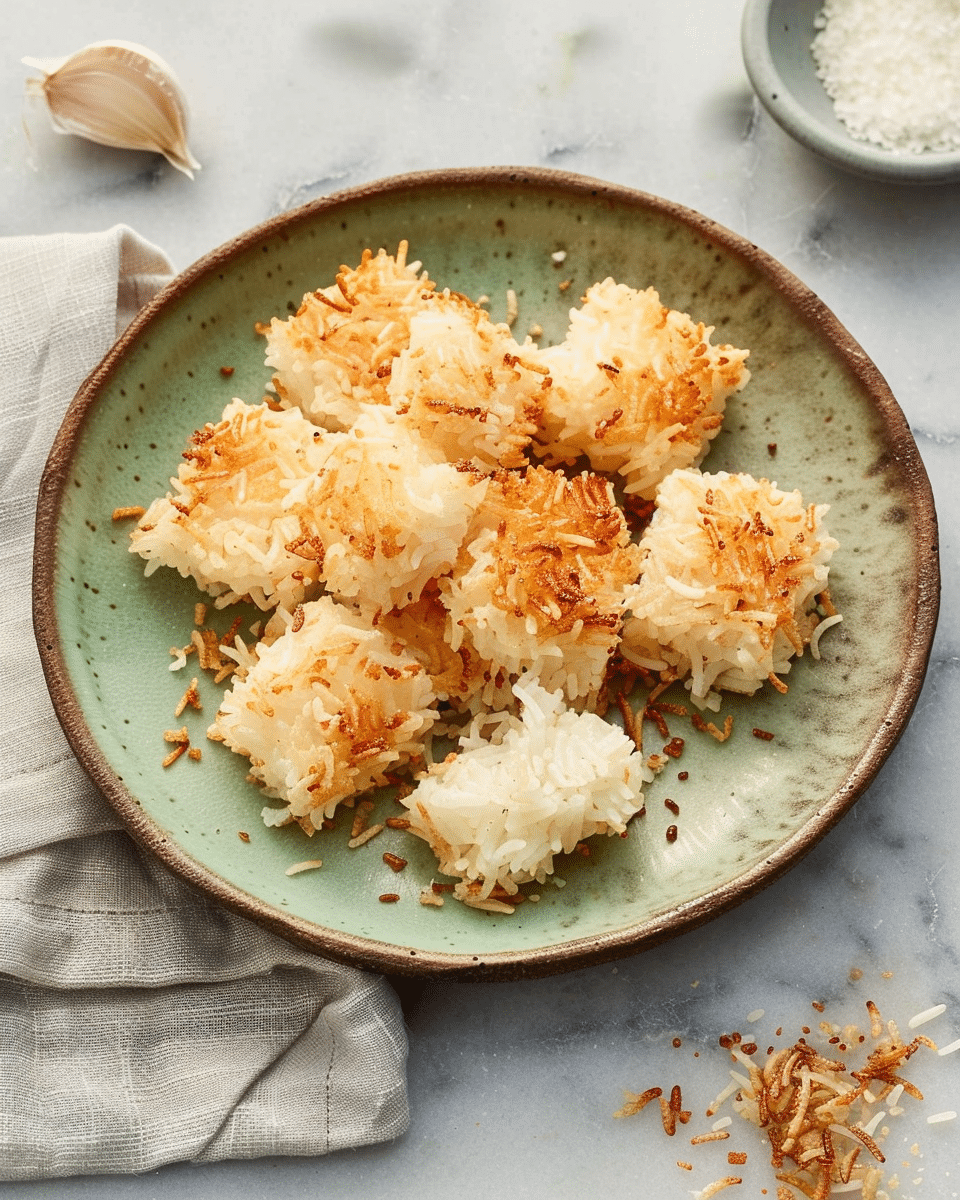
Pan‑Fry Until Golden: Heat the neutral oil in a pan over medium heat. Carefully place the rice pieces in the pan (don’t overcrowd). Cook about 3‑4 minutes per side, or until golden brown and crispy. Remove and drain on a paper towel.
-
Serve and Enjoy: Serve the crispy rice as is, or top with your choice of toppings — for example spicy tuna, avocado slices, a drizzle of soy sauce or sriracha mayo.
Servings and timing
Servings: 4
Prep Time: ~15 minutes + at least 4 hours chilling
Cook Time: ~15 minutes
Total Time (excluding chilling): ~30 minutes
Variations
-
Swap white short‑grain rice for brown rice for added fiber and nuttier flavor.
-
Instead of pan‑frying, you can bake the rice squares: lightly brush with oil and bake at 400 °F (200 °C) for about 15 minutes, flipping halfway through.
-
Try breaking larger squares into smaller pieces and use them as a salad topping for texture contrast.
-
Make a sushi‑inspired version: top the crisped rice squares with spicy crab, smoked salmon, mashed avocado, or a soft‑boiled egg.
-
Use different oils (e.g., sesame oil) or add herbs/spices to the rice before pressing for extra flavour.
Storage/Reheating
If you want to store or reheat:
-
To store: After pressing and chilling (but before frying) you can keep the rice layer in an airtight container in the fridge for up to 3 days.
-
To freeze: Chill and cut the rice into pieces, place on a baking sheet and freeze until solid. Then transfer into a resealable bag or container. When ready to cook, thaw about 10 minutes and then fry.
-
To reheat leftovers: Avoid the microwave (it will soften the crisp). Instead, reheat in a dry pan over medium heat for 1‑2 minutes per side to restore crunch.
FAQs
1. Can I use leftover cooked rice for crispy rice?
Yes — leftover rice works well as long as it’s properly chilled and pressed into a firm shape before frying.
2. What’s the best type of rice for crispy rice?
Short‑grain or sushi rice is best because its higher starch content helps it hold together when frying.
3. How do I keep the rice from falling apart when frying?
Chilling the rice for at least four hours (or overnight) is essential. Pressing the rice firmly into a pan before cutting also helps it hold its shape during frying.
4. Can I make crispy rice without oil?
Yes — you can bake it instead of frying or use a non‑stick pan with minimal oil to reduce fat content.
5. What dipping sauces go well with crispy rice?
Good options include soy sauce, spicy mayo, eel sauce, or ponzu.
6. Can I make crispy rice ahead of time?
Yes — you can cook and press the rice in advance, then fry it when you’re ready to serve.
7. How do I get the crispiest texture?
Use medium heat, don’t overcrowd the pan, and press the rice lightly with a spatula during frying to ensure even browning.
8. Can I air‑fry crispy rice?
Yes — lightly spray the rice squares with oil and air‑fry at about 375 °F (190 °C) for 10‑12 minutes, flipping halfway through.
9. Can I use jasmine rice for crispy rice?
Yes, but jasmine (or basmati) won’t stick together as well as short‑grain rice. If using these, adding a bit of cornstarch can help bind the grains.
10. What are some fun toppings for crispy rice?
Try spicy crab, guacamole, kimchi, thinly sliced salmon, or a fried egg for unique and tasty variations.
Conclusion
Crispy rice turns a humble staple into something remarkably textured and fun to eat. With minimal ingredients but a little planning (especially the chilling step), you’ll get golden, crunchy squares that serve beautifully as an appetizer, side or snack. The customization possibilities are wide — whether you dress them with bold toppings, serve them as salad crunch, or use them as the base of a bowl. Try it once and you’ll likely discover your favourite way to enjoy it.
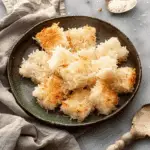
Crispy Rice
- Total Time: 1 hour 25 minutes
- Yield: Serves 4
- Diet: Vegan
Description
This crispy rice recipe turns simple cooked rice into golden, crunchy squares that are perfect as a snack or base for various toppings. It’s an easy, versatile dish that delivers texture and flavor with every bite.
Ingredients
- 2 cups cooked sushi rice (or any short-grain rice)
- 2 tablespoons rice vinegar
- 1 tablespoon sugar
- 1/2 teaspoon salt
- Vegetable oil, for frying
Instructions
- In a small bowl, mix rice vinegar, sugar, and salt until dissolved.
- Transfer the cooked rice to a large bowl and gently fold in the vinegar mixture until evenly combined.
- Line a baking dish with parchment paper and press the rice mixture into an even layer, about 1/2 inch thick. Cover and refrigerate for at least 1 hour or until firm.
- Once chilled, cut the rice into squares or rectangles using a sharp knife.
- Heat a generous amount of vegetable oil in a non-stick skillet over medium heat.
- Fry the rice pieces in batches for 3–4 minutes per side or until golden brown and crispy. Avoid overcrowding the pan.
- Transfer to a paper towel-lined plate to drain excess oil.
- Serve as-is or top with your favorite ingredients like spicy tuna, avocado, or sashimi.
Notes
- Make sure the rice is cold and firm before frying to help it hold its shape.
- You can use leftover rice, but short-grain or sushi rice works best for holding together.
- Use a non-stick pan and don’t flip the rice until it naturally releases to prevent breaking.
- Prep Time: 10 minutes
- Cook Time: 15 minutes
- Category: Appetizer
- Method: Frying
- Cuisine: Asian
Nutrition
- Serving Size: 1/4 of recipe
- Calories: 210
- Sugar: 2g
- Sodium: 180mg
- Fat: 10g
- Saturated Fat: 1g
- Unsaturated Fat: 8g
- Trans Fat: 0g
- Carbohydrates: 27g
- Fiber: 1g
- Protein: 3g
- Cholesterol: 0mg

