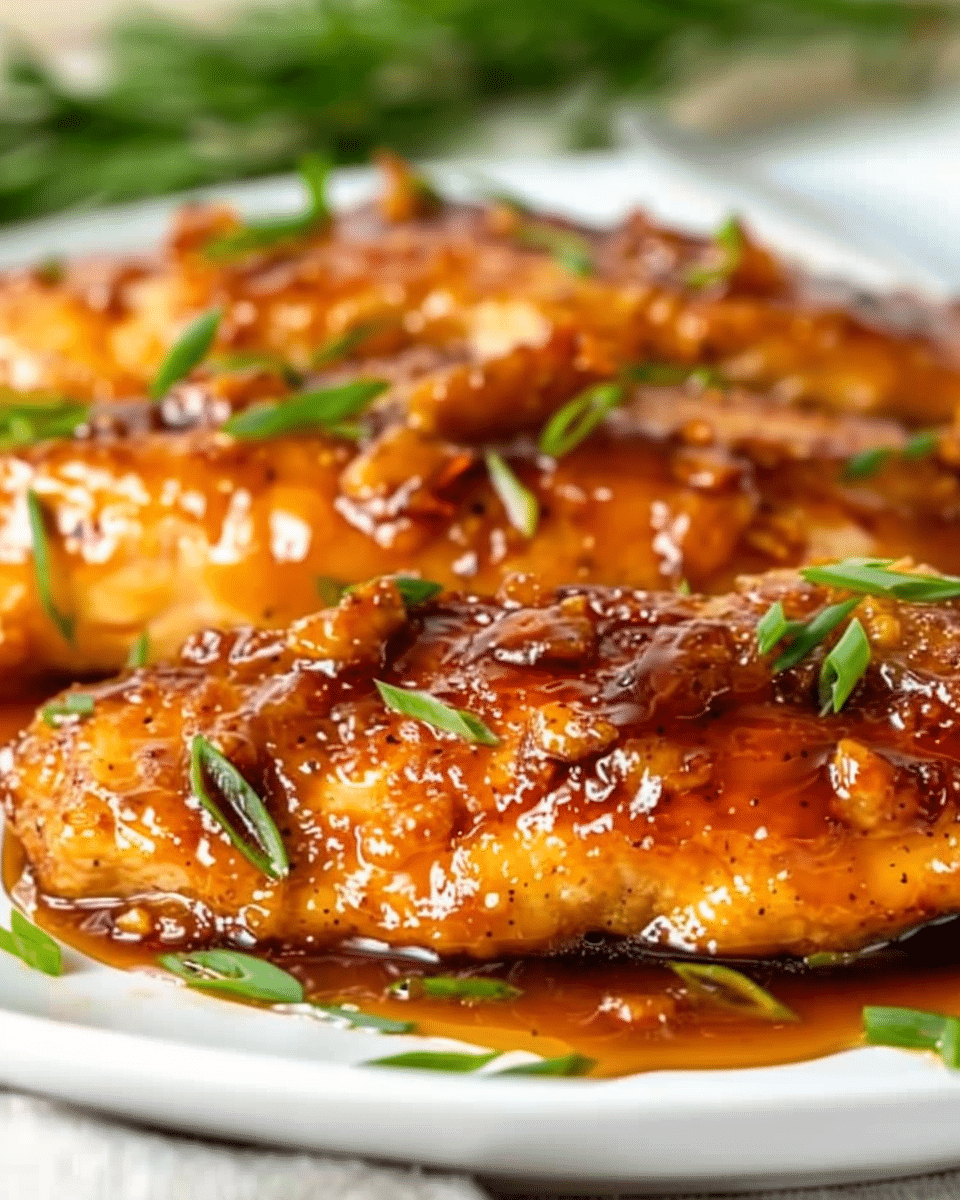
Why You’ll Love Double Crunch Honey Garlic Chicken Breasts Recipe
-
The double layer of coating gives you exceptional crispiness—each bite offers a satisfyingly crunchy exterior.
-
The honey‑garlic sauce brings sweet, garlicky richness that pairs beautifully with the crunchy chicken.
-
Works for a weeknight dinner yet feels special enough for guests.
-
Adaptable: you can fry or bake the chicken depending on your preference for less oil.
-
Great leftovers (if there are any!).
Ingredients
(Tip: You’ll find the full list of ingredients and measurements in the recipe card below.)
-
Large boneless, skinless chicken breasts
-
All‑purpose flour
-
Salt
-
Black pepper
-
Ground ginger
-
Ground nutmeg
-
Ground thyme
-
Ground sage
-
Cayenne pepper (or chili pepper)
-
Paprika
-
Eggs
-
Water
-
Olive oil
-
Minced garlic cloves
-
Honey
-
Soy sauce (preferably low sodium)
-
(Oil for frying, if using the frying method)
Directions
-
Place each chicken breast between two sheets of plastic wrap and, using a meat mallet or rolling pin, pound (or slice) so the thickness is even (about ½ inch).
-
Combine flour, salt, black pepper, ground ginger, nutmeg, thyme, sage, paprika and cayenne pepper in a mixing bowl to create the seasoned dredge.
-
In another bowl whisk together the eggs and water to make an egg wash.
-
Season the chicken breasts with a little salt and pepper. Then dip each breast into the flour‑spice mixture. Next dip into the egg wash. Then again into the flour‑spice mixture, pressing the coating so it adheres well.
-
If frying: heat oil (enough to cover about ½‑inch in the bottom of a skillet) to a medium heat (moderate so the coating browns without burning). Fry chicken about 4‑5 minutes per side until golden brown and cooked through. Drain briefly on a wire rack or paper towels.
-
If baking (lighter version): Preheat oven to about 425°F (≈ 220°C). Place a baking sheet with a wire rack inside to pre‑heat. Prepare chicken as above, coat it, then transfer to the hot rack (lightly oiled bottom) with space between pieces. Lightly spray the top of the chicken with oil. Bake without opening the oven for ~15 minutes, flip and bake another ~10‑15 minutes until crisp and cooked through.
-
Meanwhile, prepare the honey‑garlic sauce: in a saucepan over medium heat add olive oil and minced garlic—cook briefly until fragrant (avoid browning). Add honey, soy sauce and a bit of black pepper; simmer for 5‑10 minutes, watching carefully as the sauce can foam. Remove from heat and let it rest a moment.
-
Once chicken is cooked, dip each piece into the sauce (or pour sauce over the chicken) so both sides are coated. Serve immediately (ideally with steamed rice, noodles or veggies).
Servings and timing
-
Serves: Approximately 4 people (when using four large chicken breasts).
-
Prep time: ~15 minutes
-
Cook time: ~15–20 minutes (frying) or ~25–30 minutes (baking)
-
Total time: ~30 minutes (frying) or ~40–45 minutes (baking)
Variations
-
Use boneless, skinless chicken thighs instead of breasts for more flavour and juiciness.
-
Swap flour for rice flour or a gluten‑free flour blend to make it gluten‑friendly.
-
Add sesame seeds or chopped green onions over the finished dish for extra texture and flavour.
-
Make it spicier by increasing the cayenne/chili pepper in the dredge or adding a few dashes of sriracha to the sauce.
-
For a lighter version, use the baking method or air‑fry the coated chicken pieces until crisp.
Storage/Reheating
-
Storage: Refrigerate leftover chicken in an airtight container for up to 3 days. Keep the sauce separate if possible to maintain crispness of the coating.
-
Reheating: Reheat in a pre‑heated oven at ~350°F (≈175°C) for about 10 minutes, or until warmed through, to help retain the crunch. Avoid reheating in the microwave if possible, as it will soften the coating.
FAQs
What thickness should the chicken breasts be?
Aim for about ½ inch (≈1.25 cm) thickness after pounding or slicing to ensure even cooking and proper crisping.
Can I use chicken thighs instead of breasts?
Yes — boneless, skinless thighs work well and stay juicy. You may need slightly less cook time depending on size.
Is frying the only way to get the “double crunch”?
No — while frying gives the best crisp, you can bake (or even air‑fry) the coated chicken and still achieve a satisfying crunch if you follow the method (hot oven, pre‑heated rack, light oil spray).
How do I make the sauce thicker or thinner?
To thicken the sauce, simmer it a little longer until it reduces and coats the back of a spoon. To thin it, add a small splash of water or broth and stir.
Can I make this ahead of time?
You can prepare the coating and dredge ahead of time, but for best crunch serve the chicken immediately after cooking and saucing.
How do I store the leftover sauce?
Store the sauce in a separate airtight container in the fridge for up to 3 days. Reheat gently on the stove before using.
What side dishes pair well with this?
Steamed white or brown rice, noodles, sautéed or roasted vegetables (like broccoli, green beans or carrots), or a crisp salad.
How can I make it less sweet?
Reduce the honey amount in the sauce, or increase the soy sauce or add a squeeze of lemon/lime juice to cut the sweetness.
Is the coating very spicy?
It has a kick from the cayenne/chili pepper, but it’s not overwhelmingly hot. You can adjust the amount to suit your taste or omit it for a milder version.
Can I freeze leftovers?
You can freeze the cooked chicken (without sauce) in an airtight container for up to 1 month. Thaw overnight in the fridge and re‑crisp in the oven before saucing.
Conclusion
This Double Crunch Honey Garlic Chicken Breasts recipe offers the best of both worlds: a golden, crispy exterior and a rich, sticky sauce that elevates simple chicken into something special. Whether you’re cooking for a regular weeknight or entertaining guests, this dish checks the boxes for crunch, flavour, and texture. With clever variations, it can adapt to different dietary needs or flavour profiles. Serve it with your favourite sides, and enjoy every satisfying bite of crispiness and sweet‑savory goodness.
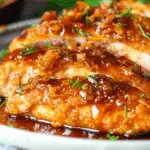
Double Crunch Honey Garlic Chicken Breasts
5 Stars 4 Stars 3 Stars 2 Stars 1 Star
No reviews
- Author: Mia
- Total Time: 30 minutes (frying) or 40–45 minutes (baking)
- Yield: Serves 4
- Diet: Halal
Description
This Double Crunch Honey Garlic Chicken Breasts recipe delivers ultra-crispy chicken coated in a sweet and garlicky sauce. It’s easy enough for weeknights yet special enough for guests, with options to fry or bake for a lighter take.
Ingredients
- 4 large boneless, skinless chicken breasts
- 1 cup all-purpose flour
- 1 tsp salt (plus more to season chicken)
- 1 tsp black pepper (plus more to season chicken)
- 1/2 tsp ground ginger
- 1/4 tsp ground nutmeg
- 1/2 tsp ground thyme
- 1/2 tsp ground sage
- 1/2 tsp cayenne pepper (or chili pepper)
- 1 tsp paprika
- 2 large eggs
- 2 tbsp water
- 1 tbsp olive oil
- 4 garlic cloves, minced
- 1/2 cup honey
- 1/4 cup low sodium soy sauce
- Oil for frying (if using frying method)
Instructions
- Place each chicken breast between two sheets of plastic wrap and pound or slice to an even ½ inch thickness.
- In a mixing bowl, combine flour, salt, black pepper, ground ginger, nutmeg, thyme, sage, paprika, and cayenne pepper.
- In another bowl, whisk together eggs and water to make an egg wash.
- Season chicken breasts with salt and pepper. Dip each breast into the flour mixture, then into the egg wash, then again into the flour mixture, pressing to adhere.
- If frying: Heat oil in a skillet (about ½ inch deep) over medium heat. Fry chicken for 4–5 minutes per side until golden brown and cooked through. Drain on a wire rack or paper towels.
- If baking: Preheat oven to 425°F (220°C). Preheat a baking sheet with a wire rack. Place coated chicken on the hot rack, spray lightly with oil. Bake for 15 minutes, flip, and bake another 10–15 minutes until crisp and cooked through.
- For the sauce: In a saucepan over medium heat, add olive oil and minced garlic. Cook until fragrant (do not brown). Add honey, soy sauce, and black pepper. Simmer for 5–10 minutes, watching carefully to avoid foaming over. Remove from heat and let rest.
- Once chicken is cooked, dip each piece in the sauce or pour the sauce over top. Serve immediately with sides like rice, noodles, or vegetables.
Notes
- Use boneless, skinless chicken thighs for extra juiciness.
- Swap all-purpose flour for rice flour or gluten-free blend for gluten-free option.
- Adjust cayenne to make it spicier or milder.
- Reheat leftovers in the oven to retain crispiness—avoid microwaving.
- Store sauce separately for best texture when reheating.
- Prep Time: 15 minutes
- Cook Time: 15–20 minutes (frying) or 25–30 minutes (baking)
- Category: Main Course
- Method: Frying or Baking
- Cuisine: Fusion
Nutrition
- Serving Size: 1 chicken breast with sauce
- Calories: 420
- Sugar: 18g
- Sodium: 620mg
- Fat: 17g
- Saturated Fat: 3g
- Unsaturated Fat: 12g
- Trans Fat: 0g
- Carbohydrates: 35g
- Fiber: 1g
- Protein: 34g
- Cholesterol: 135mg

