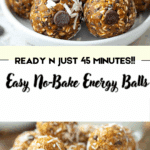
Why You’ll Love Easy No‑Bake Energy Balls Recipe
-
They come together in minutes—no baking required.
-
They use pantry staples and require minimal ingredients.
-
They’re portable and convenient to grab on the go.
-
They strike a good balance between sweet and satisfying (thanks to the oats, nut butter and chocolate chips).
-
You can easily customise them to your taste or dietary needs.
Ingredients
(Tip: You’ll find the full list of ingredients and measurements in the recipe card below.)
-
rolled oats
-
peanut butter (creamy or chunky)
-
honey
-
mini chocolate chips
-
ground flaxseed (or other “power‑seed” option)
-
vanilla extract
-
salt
Directions
-
In a mixing bowl, combine the oats, ground flaxseed, peanut butter, honey, vanilla extract and salt until evenly mixed.
-
Stir in the mini chocolate chips.
-
Scoop the mixture and roll into bite‑sized balls (about 1‑inch diameter or according to preference).
-
Place the balls on a baking sheet or tray and refrigerate for about 30 minutes (or until firm enough to handle).
-
Enjoy immediately or transfer to a storage container and store as directed below.
Servings and timing
-
Yield: approximately 20–24 energy balls (depending on size)
-
Prep time: about 10 minutes
-
Chill time: about 30 minutes
-
Total time: about 40 minutes
Variations
-
Swap peanut butter for almond butter, cashew butter or sunflower seed butter (for a nut‑free version).
-
Use maple syrup instead of honey for a vegan‑friendly option.
-
Replace mini chocolate chips with dried cranberries, chopped nuts, coconut flakes or cacao nibs.
-
Add a tablespoon of cocoa powder for “double chocolate” flavour.
-
Roll the finished balls in shredded coconut, chopped nuts or cocoa powder for a different finish.
Storage/Reheating
-
Store the energy balls in an airtight container in the refrigerator for up to one week.
-
For longer storage, freeze them in a freezer‑safe bag or container for up to 2–3 months. Thaw in the fridge or at room temperature for 10–15 minutes before eating.
-
No reheating required—they’re ready to eat as is.
FAQs
What kind of oats should I use?
Old‑fashioned rolled oats work best for texture, but you can also use quick oats if needed.
Can I make these gluten‑free?
Yes—just use certified gluten‑free oats and ensure all other ingredients (e.g., chocolate chips) are gluten‑free.
Are these suitable for vegans?
They can be: use maple syrup instead of honey and check that your nut butter and chocolate chips are vegan.
How firm should the mixture be before rolling?
The mixture should hold together when pressed. If it’s too loose, add a bit more oats or chill slightly.
Can I make them larger or smaller?
Yes—just adjust the size of each ball. Keep in mind the yield and storage recommendations may vary.
What’s the nutritional value like?
These are a snack—not a full meal—so they provide energy from healthy fats, oats and a bit of sweetness. Portion accordingly.
Can I add protein powder?
Yes you can add a scoop of your favourite protein powder—but you may need to adjust binding ingredients (nut butter or oats) to keep the texture right.
Will they melt or get messy if carried around?
If kept in a cool place or insulated bag, they should be fine. Otherwise, storing them in the fridge helps maintain firm texture.
Can I bake them instead of chilling?
This recipe is designed to be no‑bake. Baking would change the texture and is not necessary.
Why are they sticky?
Nut butter and honey create a naturally sticky dough to hold the oats together. If your ingredients are too dry or the honey is thick, the mixture may require extra oats or a short chill before rolling.
Conclusion
This no‑bake energy ball recipe is a simple, versatile and satisfying snack option you’ll want to keep in your rotation. With minimal prep and ingredients, you can have a batch of healthy bites ready in under 40 minutes—perfect for busy days, workouts or just when you need a sweet pick‑me‑up. Enjoy customizing it to your preferences and making it your own!

Easy No‑Bake Energy Balls
5 Stars 4 Stars 3 Stars 2 Stars 1 Star
No reviews
- Author: Mia
- Total Time: 40 minutes
- Yield: 24 energy balls
- Diet: Vegetarian
Description
These no-bake energy balls are a healthy, quick, and easy snack made with oats, peanut butter, honey, flaxseed, and chocolate chips. Perfect for on-the-go energy boosts or pre/post workout fuel.
Ingredients
- 1 cup (90 grams) old-fashioned oats
- 2/3 cup (65 grams) toasted shredded coconut
- 1/2 cup (125 grams) creamy peanut butter
- 1/2 cup (90 grams) ground flaxseed
- 1/2 cup (90 grams) semisweet chocolate chips
- 1/3 cup (113 grams) honey
- 1 tablespoon chia seeds (optional)
- 1 teaspoon vanilla extract
Instructions
- Stir all the ingredients together in a large bowl until well combined.
- Refrigerate the mixture for 30 minutes to make it easier to handle.
- Roll the mixture into 1-inch balls using your hands.
- Store the energy balls in an airtight container in the refrigerator for up to 1 week or freeze for longer storage.
Notes
- You can substitute peanut butter with almond or other nut butters.
- Add-ins like dried fruit, protein powder, or spices (cinnamon) can enhance flavor and nutrition.
- If the mixture is too dry, add a bit more honey or peanut butter; if too sticky, add a bit more oats or flaxseed.
- Prep Time: 10 minutes
- Cook Time: 0 minutes
- Category: Snack
- Method: No-Bake
- Cuisine: American
Nutrition
- Serving Size: 1 energy ball
- Calories: 130
- Sugar: 6g
- Sodium: 40mg
- Fat: 8g
- Saturated Fat: 3g
- Unsaturated Fat: 4g
- Trans Fat: 0g
- Carbohydrates: 12g
- Fiber: 2g
- Protein: 3g
- Cholesterol: 0mg


