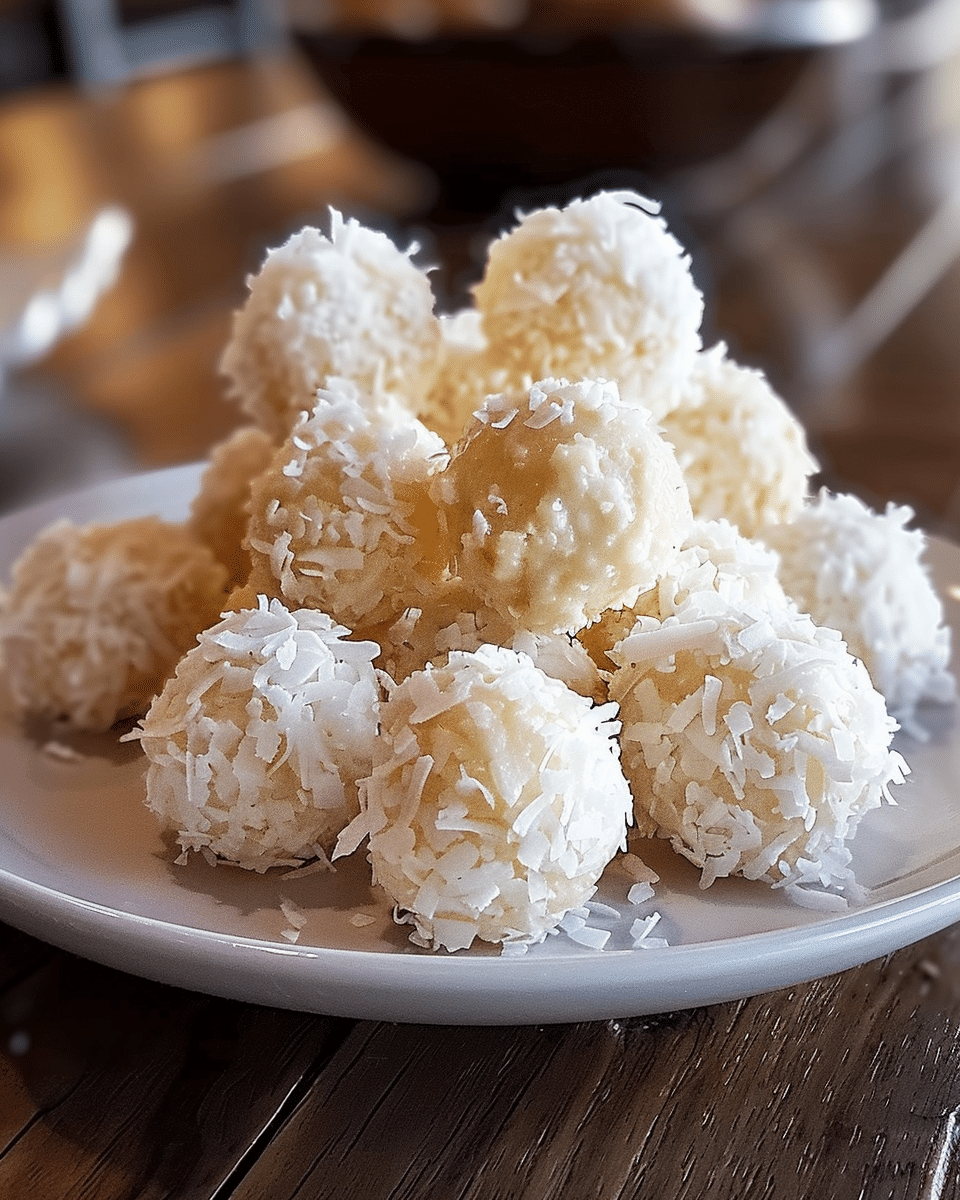
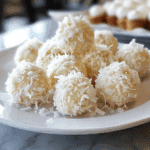
Why You’ll LoveNo Bake Cream Cheese Coconut Snowballs Recipe
Because you’ll enjoy:
-
A no-bake dessert that’s quick to prepare and doesn’t require turning on the oven
-
A creamy, melt-in-your-mouth texture from the combination of cream cheese and coconut
-
Simple ingredients that are budget-friendly and easy to find
-
A versatile recipe that can be customized with add-ins like nuts, chocolate chips, or dried fruit
-
A perfect bite-sized treat for gifting, entertaining, or snacking
Ingredients
(Tip: You’ll find the full list of ingredients and measurements in the recipe card below.)
-
Cream cheese, softened
-
Powdered sugar
-
Sweetened shredded coconut (divided for mixing and coating)
-
Vanilla extract
Optional additions: -
Chopped nuts
-
Mini chocolate chips
-
Dried fruit pieces
Directions
-
In a large mixing bowl, beat the softened cream cheese until smooth.
-
Add powdered sugar and vanilla extract, and continue to mix until well combined.
-
Stir in part of the shredded coconut until the mixture is thick and holds its shape.
-
Scoop small amounts of the mixture (about 1 tablespoon each) and roll into balls using your hands.
-
Roll each ball in the remaining shredded coconut until fully coated.
-
Place the finished snowballs on a tray lined with parchment paper.
-
Chill in the refrigerator for at least 1 hour to firm up before serving.
Servings and timing
-
Servings: approximately 20–24 snowballs
-
Preparation time: 15 minutes
-
Chill time: 1 hour
-
Total time: about 1 hour 15 minutes
Variations
-
Nutty snowballs: Add chopped pecans, almonds, or walnuts for crunch and flavor.
-
Chocolate chip snowballs: Stir in mini chocolate chips for a fun twist.
-
Holiday version: Add a drop of peppermint extract or roll in colored coconut for seasonal flair.
-
Fruit-filled: Mix in finely chopped dried cherries, cranberries, or pineapple for a fruity bite.
-
Low-sugar option: Use less powdered sugar or a sugar substitute to adjust sweetness.
Storage/Reheating
-
Store snowballs in an airtight container in the refrigerator for up to 5 days.
-
For longer storage, freeze the snowballs in a single layer, then transfer to a freezer-safe container. They’ll keep well for up to 1 month.
-
Thaw in the refrigerator or at room temperature before serving.
-
These snowballs are best enjoyed chilled or slightly softened; no reheating needed.
FAQs
Can I make these snowballs ahead of time?
Yes, these are perfect make-ahead treats. You can prepare them a day or two in advance and keep them chilled until ready to serve.
Can I freeze cream cheese coconut snowballs?
Absolutely. Freeze them in a single layer first, then store in a sealed container. Thaw before serving.
What type of coconut should I use?
Use sweetened shredded coconut for best flavor and texture. Unsweetened can be used but may alter taste and moisture.
Can I use flavored extracts other than vanilla?
Yes, try almond, coconut, peppermint, or citrus extracts for a unique flavor.
Why are my snowballs too soft to roll?
If your mixture is too soft, try adding more shredded coconut or chilling it briefly before rolling.
Can I use low-fat cream cheese?
You can, but full-fat cream cheese gives the best creamy texture and flavor.
How long should they chill before serving?
Chill for at least 1 hour, but longer is even better to ensure they hold their shape.
Can I dip these in chocolate?
Yes! Chill them first, then dip in melted chocolate and let set for a chocolate-coated variation.
Are these gluten-free?
Yes, all the ingredients are naturally gluten-free, but always check packaging to be sure.
Can kids help make these?
Definitely — this is a great no-bake recipe for kids to help roll and coat the snowballs.
Conclusion
These no bake cream cheese coconut snowballs are everything you want in a dessert — easy, quick, creamy, and absolutely delicious. Whether you’re making them for the holidays or just to satisfy a sweet craving, they come together with minimal effort and maximum flavor. Keep them chilled and enjoy them as the perfect little bite-sized indulgence.
No Bake Cream Cheese Coconut Snowballs
5 Stars 4 Stars 3 Stars 2 Stars 1 Star
No reviews
- Author: Mia
- Total Time: 1 hour 15 minutes
- Yield: 20–24 snowballs
- Diet: Gluten Free
Description
These no-bake cream cheese coconut snowballs are a delightful and easy treat made with just a few simple ingredients. Soft, sweet, and coated in coconut flakes, they’re perfect for holidays, parties, or a quick dessert any time of year.
Ingredients
- 8 oz cream cheese, softened
- 2 cups powdered sugar
- 2 1/2 cups sweetened shredded coconut (divided)
- 1 tsp vanilla extract
- Optional: 1/2 cup chopped nuts
- Optional: 1/2 cup mini chocolate chips
- Optional: 1/4 cup finely chopped dried fruit
Instructions
- In a large mixing bowl, beat the softened cream cheese until smooth.
- Add powdered sugar and vanilla extract, and continue to mix until well combined.
- Stir in 1 1/2 cups of the shredded coconut until the mixture is thick and holds its shape.
- Fold in any optional add-ins like nuts, chocolate chips, or dried fruit if using.
- Scoop about 1 tablespoon of the mixture and roll into a ball using your hands.
- Roll each ball in the remaining 1 cup of shredded coconut until fully coated.
- Place the finished snowballs on a parchment-lined tray.
- Chill in the refrigerator for at least 1 hour to firm up before serving.
Notes
- If the mixture is too soft to roll, chill it for 15–20 minutes or add more shredded coconut.
- Use sweetened shredded coconut for best texture and flavor.
- Store in the fridge for up to 5 days or freeze for up to 1 month.
- Great recipe for kids to help with — no baking required!
- Prep Time: 15 minutes
- Cook Time: 0 minutes
- Category: Dessert
- Method: No-Bake
- Cuisine: American
Nutrition
- Serving Size: 1 snowball
- Calories: 110
- Sugar: 10g
- Sodium: 35mg
- Fat: 7g
- Saturated Fat: 6g
- Unsaturated Fat: 1g
- Trans Fat: 0g
- Carbohydrates: 11g
- Fiber: 1g
- Protein: 1g
- Cholesterol: 10mg

