Why You’ll Love Sourdough Bread Recipe Recipe
-
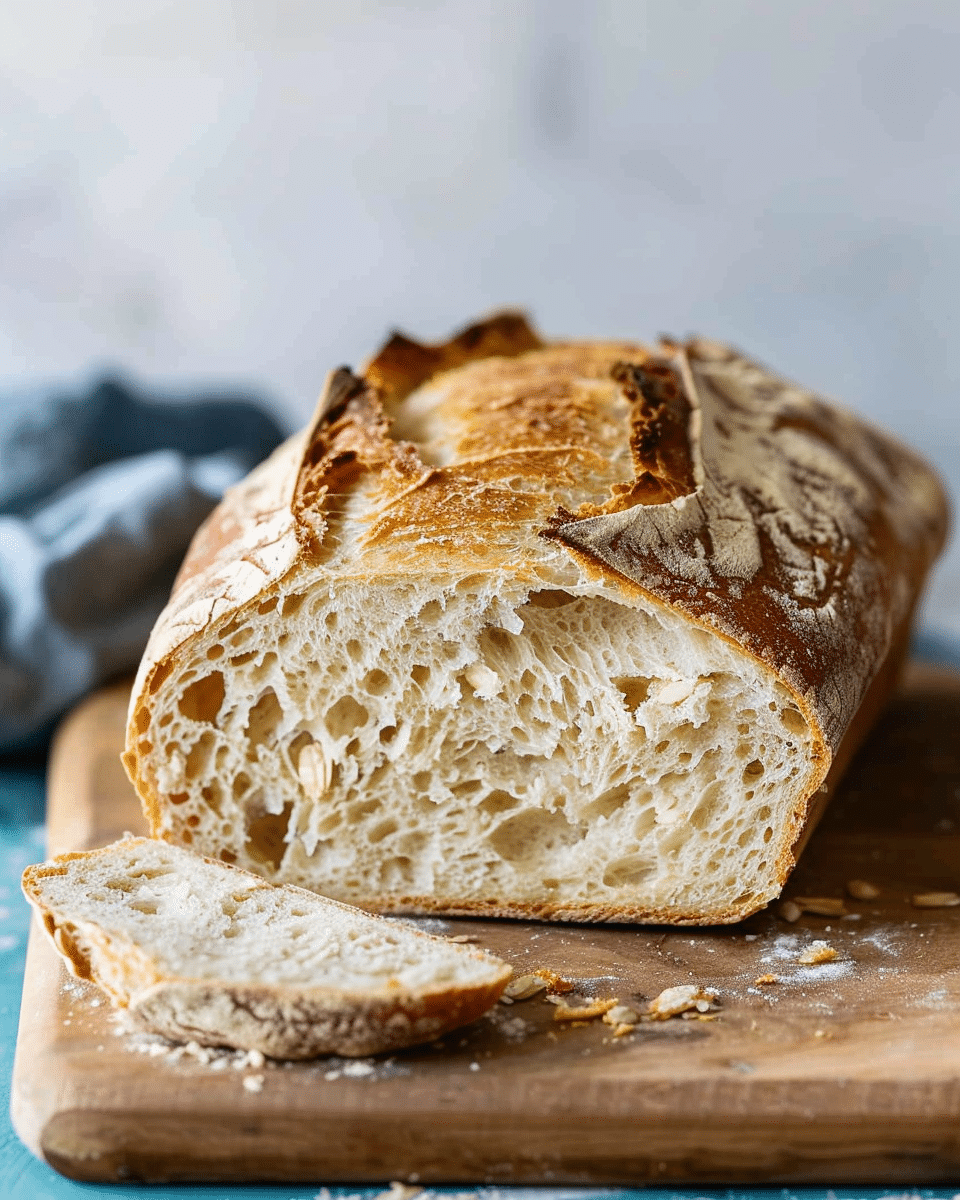
It yields a hearty, homemade loaf that tastes far better than most store-bought breads.
-
It’s surprisingly approachable: no kneading, no stand mixer required, and you can use a simple loaf pan instead of specialized equipment.
-
The flavor and texture are versatile—perfect for sandwiches, grilled cheese, or simply dipping in soup.
-
It uses a 70% hydration dough that results in a crumb that’s open yet substantial, with minimal sour flavor but great texture.
Ingredients
(Tip: You’ll find the full list of ingredients and measurements in the recipe card below.)
• Active sourdough starter (bubbly and fed)
• Warm water (about 90 °F)
• Olive oil
• Bread flour (or all-purpose in a pinch)
• Table salt
• Oil for greasing the pan
• Additional flour for dusting your work surface
Directions
-
Make the dough / Autolyse step: In a large mixing bowl, combine the active starter, warm water, and olive oil. Add the bread flour and salt. Stir until mostly combined (the dough will look shaggy). Cover and let rest for one hour.
-
Stretch & fold: Form the dough into a ball. Wet your hands and perform a stretch-and-fold: lift the top of the dough and fold it over the bottom, then turn 90° and repeat. Do this four times. Cover and let rest for 30 minutes. Repeat this stretch-and-fold process every 30 minutes until the dough increases in size by about 80% (typically 4–6 hours).
-
Forming the dough: Lightly grease a 9×5-inch loaf pan. Turn the dough onto a lightly floured surface. Gently deflate and pat it into a rectangle. Fold one side to the center, then the other over it (like a letter). Roll it into a tight log from the short end, tuck the ends, and place it into the pan. Cover loosely and refrigerate overnight (12–24 hours).
-
Same-day baking option: After shaping into the pan, let the dough rest uncovered for 30–35 minutes while preheating the oven to 450°F. Then continue with baking.
-
-
Baking: Remove the loaf from the fridge. Preheat oven to 450°F (230°C). Score the top (¼-inch deep down the center), cover with another pan or foil tent, and bake for 30 minutes. Remove the cover and bake an additional 20–23 minutes, or until the internal temperature reaches 206°F (97°C).
-
Cooling: Let the bread cool in the pan for 15 minutes, then remove and transfer to a cooling rack. Let it cool completely (or at least until just warm) before slicing to avoid a gummy texture.
Servings and timing
-
Serves: 1 loaf
-
Prep time: About 2 hours (active)
-
Cook time: Approximately 50 minutes
-
Rising / proofing time: Around 16 hours (overnight refrigeration)
-
Total time: Roughly 18 hours 50 minutes
Variations
-
Use all-purpose flour instead of bread flour if needed—texture will be slightly less chewy.
-
For a more open crumb and tangier flavor, increase hydration or extend fermentation.
-
Use a preheated Dutch oven instead of a loaf pan for a rustic, round loaf.
-
Add herbs, olives, roasted garlic, or cheese for a savory twist.
-
Substitute up to 20% of the flour with whole wheat or rye for added flavor depth (adjust hydration as needed).
Storage/Reheating
-
To store: Keep at room temperature in an airtight container or bread bag for up to 1 week.
-
To freeze: Wrap the whole loaf in plastic and foil, or slice and freeze in a zip-top bag with air pressed out. Thaw at room temperature before unwrapping.
-
To reheat: Preheat oven or toaster oven to 350°F (175°C). Mist the bread with water and warm for 5–10 minutes. Toast sliced bread straight from the freezer if desired.
-
Best consumed: Within 2–3 days for peak freshness. Reheating improves older slices.
FAQs
1. How active should my sourdough starter be before I use it?
It should be bubbly, recently fed, and either float in water or show signs of doubling in size.
2. Can I skip the overnight fridge proof and bake right away?
Yes, but the bread will have less flavor and structure. The overnight proof enhances both.
3. What happens if my oven spring is weak?
Weak rise could mean under or over-proofing, or improper scoring. Ensure dough has risen ~80% before baking and score well.
4. Why does the recipe use olive oil?
Olive oil softens the crumb, improves chewiness, and keeps the loaf from drying out quickly.
5. Do I have to use bread flour?
Bread flour is ideal for better gluten development, but all-purpose flour works in a pinch with slightly denser results.
6. Why use stretch and fold instead of kneading?
Stretch-and-fold gently develops gluten in high-hydration doughs without overworking them, making it easier and less messy.
7. How do I know the dough is ready during bulk fermentation?
It should have risen about 80%, look puffy, slightly domed, and have visible bubbles. Visual cues matter more than time.
8. Can I bake this in a Dutch oven?
Yes. Shape the dough, refrigerate or proof, then bake in a preheated Dutch oven at the same temperature.
9. Why shouldn’t I slice warm bread?
Slicing too soon releases steam and causes a gummy texture. Wait until it’s at least just warm before slicing.
10. How can I make the bread more sour?
Extend the cold proof time, increase hydration slightly, or use a more acidic starter culture.
Conclusion
This sourdough bread recipe balances ease and flavor beautifully. With no kneading and basic ingredients, it’s ideal for beginners and seasoned bakers alike. The overnight rise enhances taste and texture, resulting in a versatile loaf perfect for everyday meals. Once you try this method, it just might become your go-to sourdough recipe.
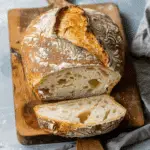
Sourdough Bread Recipe
5 Stars 4 Stars 3 Stars 2 Stars 1 Star
No reviews
- Author: Mia
- Total Time: 15-18 hours (including overnight proofing)
- Yield: 1 loaf
- Diet: Vegan
Description
A simple, step-by-step sourdough bread recipe made with an active sourdough starter. This rustic loaf has a crisp crust and chewy, flavorful interior, perfect for beginners and seasoned bakers alike.
Ingredients
- 500 g (about 4 cups + 2 Tbsp) bread flour
- 375 g (1 1/2 cups + 2 Tbsp) water, lukewarm
- 100 g (about 1/2 cup) active sourdough starter
- 10 g (about 1 1/2 tsp) fine sea salt
Instructions
- In a large bowl, mix flour and water until just combined. Cover and let rest for 1 hour (autolyse).
- Add sourdough starter and salt to the dough. Mix thoroughly until fully incorporated.
- Let dough rest for 30 minutes, then begin stretch and folds every 30 minutes for 4 total rounds.
- After final stretch and fold, cover and let dough rise at room temperature until puffy and nearly doubled (4–6 hours).
- Turn dough onto lightly floured surface, shape into a round, and let rest for 20–30 minutes uncovered.
- Final shape the dough and place seam-side up in a floured proofing basket or bowl lined with floured towel.
- Cover and refrigerate overnight (8–12 hours).
- Preheat oven to 450°F (230°C) with Dutch oven inside for 45 minutes.
- Turn dough onto parchment, score the top, and carefully transfer to hot Dutch oven.
- Bake covered for 30 minutes, then uncover and bake for another 15–20 minutes until deep golden brown.
- Remove from oven, cool on a wire rack for at least 1 hour before slicing.
Notes
- Make sure your sourdough starter is active and bubbly before using.
- Autolyse helps with gluten development for better texture.
- Overnight cold proof improves flavor and makes dough easier to score.
- You can bake directly on a baking stone or sheet if you don’t have a Dutch oven.
- Prep Time: 1 hour (plus resting & fermentation time)
- Cook Time: 45 minutes
- Category: Bread
- Method: Baking
- Cuisine: American
Nutrition
- Serving Size: 1 slice (1/12 of loaf)
- Calories: 160
- Sugar: 0g
- Sodium: 200mg
- Fat: 0.5g
- Saturated Fat: 0g
- Unsaturated Fat: 0.5g
- Trans Fat: 0g
- Carbohydrates: 33g
- Fiber: 1g
- Protein: 5g
- Cholesterol: 0mg

